Today I'm sharing how to make a French graphic monogrammed flour sack pillow! And the best part? It's no-sew! (Well, almost....)
This post contains affiliate links. A purchase of any one of these items helps to support this blog and its creative efforts at no cost to you. To read more, please see my disclosure page.
Supply List For DIY Monogram Pillow
1. Iron-on transfer paper. I got mine at Office Depot.
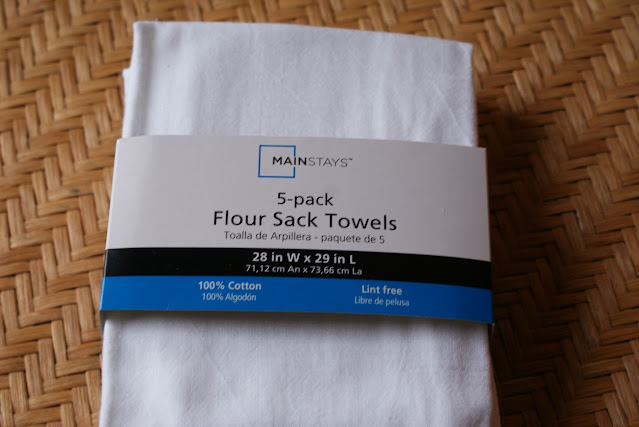
2. Flour sack towels. You can pick them up pretty inexpensively at Wal-Mart.
5. Your chosen graphic saved to your computer
6. Pillow form insert (I used a 14" by 14" insert)
7. Clothes iron (I have a Rowenta and love it.)
8. Needle and thread (for minimal seam sewing)
How To Make A Monogram Flour Sack Pillow
My monogram image as printed out on paper.
Once you've chosen a graphic, you'll need iron-on transfer paper. You should test your printer first to see which side of the paper your printer actually prints on ~ so that you end up putting the transfer paper into the printer correctly. Also, don't forget to "flip" the image in print set up before you print!
Most often you can just go to your Control Panel and set your preference for "Mirror Image: On." And that should do it. After you've flipped the image, print it out on regular printer paper first to make sure it was actually flipped. If it was, go ahead and print it out onto the transfer paper!
And this is how my image looks once it's "flipped." I know, this is just a picture of the regular printed version from the back ~ sorry but I've already "unflipped" my print set up! But you get the idea.
Now, depending on the size you've chosen for your pillow, go ahead and cut two towels down to match the size you need, adding about one extra inch to all sides. I chose to make a 14" by 14" pillow, so I cut two 15" x 15" squares.
Then you'll need to actually iron on the transfer to one of the towels, making sure the placement is centered. Just be sure to follow the instructions that come with the transfer sheets.
Once the transfer is complete and cool, you just place the towels' good sides together and run some Stitch Witchery tape in between the edges of the material on 3 sides, leaving one side open to hand stitch later. Then iron according to the package instructions.
You can see the tape sticking out at the top on either side. You'll just cut off the excess once you're done ironing it on. Then turn the sides right side out and insert the pillow form. Here's where the needle and thread comes into play. Just fold the bottom edges under and in for a clean line and stitch all along the bottom to close it up. The good news is it's white material and white thread ~ not much room for disaster there!
I chose to accent the pillow with some flour sack towel rosettes. I used the material that was left over after I cut the towels down to size. You can see my rosette tutorial here.
The towels work beautifully for rolling and twisting these flowers into shape! Once they're complete, just attach them with your handy dandy glue gun. And now for the finished product.


.png)


Leave a Comment!
Tres chic! The graphic is gorgeous and the rolled rosettes are the perfect finishing touch!
So Pretty! Thanks for sharing the tutorial
Enjoy your evening.
I am a big pillow lover and LOVE your monogrammed pillow! And the flowers are a beautiful touch!
Hi Kathy, I am crazy for the flour sack towels and love the pillow and especially the roses. I love to craft with the transfer paper. Beautiful pillow, you of many talents! Love, Penny
Those are beautiful! I will definitely have to try this. Please check out my blog!
http://shineitbright.blogspot.com/
Love this! Those little rosettes are wonderful, I'm going over to check out that tutorial. Isn't that Stitch Witchery the best? I've never tried transfer paper, but now it's on my "to do" list.
It's a beauty! ... and the tutorial is great .... very detailed instructions, love that! ... the addition of rosettes is my favorite ; )
Thank you for teaching, sharing and inspiring!
xo
Jill
I'm a sucker for pillows and rosettes, you gave me in my Aquilles heel. Beautiful pillow, I'm your 401 follower. Lovely blog!
Have a wonderful weekend!
XXX Ido
Such a sweet pillow, love the rosettes! ;)
I love your flour sack pillow- I love anything monograms and the little rosettes are so sweet too! Thanks for sharing at FNF! :)
Great tutorial, it turned out wonderfully, LOVE the monogram! Thanks so much for linking up to VIF! hugs Debra
Hi, stopping by from Freckled Laundry Textile party. Two things I love are pillows and Windsor chairs, and yours are both so pretty. I love the rosettes and the lovely monogram on your pillow. I really need to buy some transfer paper, thanks for sharing the package photo. I will remember what to look for now. Wishing you a wonderful weekend.
Wow! This really looks amazing! Thanks for sharing the tute! I would love for you to come link up to my Sew Crafty Party !
I LOVE this and the tutorial, which I have been DYING to find! Thank you!! A belated thanks for the link up too!
Hey Kathleen thanks for featuring my iron on transfer image! I featured your tutorial today at VintageFeedsacks. Thanks so much!
Thanks for joining in on the Pillow Party!
You pillow is so lovely and the tutorial is excellent!
Thanks so much for sharing at Pillowpalooza!
:)
Linda
Post a Comment